About Me

My photo
Cape Town, Northern Suburbs, South Africa
I am 100% dedicated to assisting you in creating the perfect cake or cupcake that you have dreamed of. Where you can imagine something but can't create it, I create it for you.

Friday 28 December 2012

Good Evening everyone.

Well I am still happily on holiday.  Well for another 4 days anyways, than back to baking.

But I did want to post some pictures of the cutesy Snowmen Toppers I did for some cupcakes for a client.
I couldn't put them on the cupcakes, as they were iced with Cream Cheese frosting, and Cream Cheese frosting tends to soften Fondant.  But the client has said she will post some pics of them on top of the Cupcakes.

In the meantime, I have attached some pictures of the toppers.  They were Snowmen with a Hawain/Sunny Summer twist.

Enjoy.

And here we have a few Snowmen under umbrellas, with there Beach/Snow Towels ready.  A couple of melting snowmen with there Surfboards.  And a few in there Life Savers??.


These are the cupcakes for the toppers.  Red Velvet with Cream Cheese Frosting.

So until next week.  Have fun!

Mandy-Jane

Wednesday 19 December 2012

Hello everyone,

Long time no speak.  I am currently happily on holiday, and will be back with some pictures soon.

I do have some Xmas Cupcakes to make for the 24th December.  (Special order).  The toppers are made, and are just too cute.  Will definately be posting pictures of them soon.

I have a wedding cake I am busy prepping for, for January 5th, and than I am back in full swing from the 7th January.

If anyone in the Cape Town area is wanting to place orders for January 2013 and onwards,  please mail me as soon as possible to avoid disappointment.
cakeheavensa@gmail.com

So until next week,

Have fun
Mandy-Jane

Friday 7 December 2012

Hello all you wonderful people.

I must be getting into the festive season, I am in such a good mood.  Perhaps it is the sudden lack of stress of trying to make perfect cakes that is helping.  I am pretty much done for the year.  Just a few cupcakes to make and than I am on a much needed break with my family.

That doesn't mean you can all disappear into the woodwork.  I will be coming over to pay a visit on my page every now and than to see what is happening.

So for my last cake for the year I got to do an easy peasy Picture Cake (No stress whatsoever!)  Yah.
Here is a picture of the cake.  The Birthday Man is a huge BMW fan, as you can see.


So if I don't get to hear from anyone before Christmas.  I wish all you wonderful Peeps a very happy and safe holidays.  All the best to those that are celebrating Christmas, Hanukah and any other religious holiday that I may have missed during this December month.  I will be back with a BIG BANG! in January.  But will visit with a few more pictures during December.

So all of you HAVE FUN!  AND BE SAFE!
Mandy-Ja ne

Monday 3 December 2012

Hello to all,

So I am slowly winding down for the year, and will be on leave shortly for a few weeks, before I start the new year with a BIG BANG!  A Wedding Cake and a Girly cake for the first week of January!  Phew!

I have been forced to turn a lot of new potential clients away, as I have been fully booked for the past few months.  It is always sooooo hard for me to have to say no to people.  So if you would like me to create your special occasion cake, please please please phone me at least a month in advance to avoid disappointment.

Cake design and decorating is my absolute passion!  And every cake I design (Some I do copy from pictures given to me) I get all excited over each and every cake.  Because I am only one person, I cannot take on too many cakes in a week, and have to limit myself.

Now that I have "waffled" on a bit.  I have a bunch of cakes and a couple of cupcakes to show you all this week.

So, first up was an order from a client who I did a couple of cakes and cupcakes for.  All theme related over the few days.  I started off having to bake 35 cupcakes in Pink, Purple and White Buttercream Icing.  I added a surprise topper of Music Notes on each cupcake.


I thought they looked gorgeous even without the Music Notes (Loved the colors) so I took a couple of photos of them plain as well.

Than the next day, I was asked by the same client to make a Picture cake for her daughter, so sticking with the Music theme, this is what I did.

AND THEN... For the Saturday (The day of her birthday party)  I was asked to do a 2 Tiered cake in Pink and White, I was entrusted to do it in a design I thought would look great.  And I was so happy with the final product.  The young lady was very happy with her cake.

So, in between all these cakes, I had a couple of other 2 Tiered cakes to do (Definitely the week of the 2 tiered cakes!).
The next cake, I think is my favorite at the moment.  Because here, the client asked me to just do what I thought would look great, as long as it was Avengers!, I got to design the cake, and loved doing it.  Of course Armando's face when he saw his cake was priceless!  (This is why I create and design).
Thors' Hammer was made out of Rice Crispy Treats, and covered in Fondant, so he could munch away on the hammer.  And the cake was flavored Strawberry, which smelt so yummy when I was baking it.
And the Board (Even though you can't see it) Was cut out in the shape of Iron Mans' Helmet.


And lastly, I made a cake for 2 little girls.  One who turned 6, and one who had turned 2.  Each one wanted there own theme, so this cake got to be a "half and half"  Half Hello Kitty, and half Minnie Mouse.  I tried to make the 2 tiered cake look like 2 separate cakes without taking away the color scheme or design.
Also, each little girl got there own figurine to take home or munch on.


Well, that was my busy, busy week.  I have one small picture cake to do this week, and than I take a break. Have some special Christmas cupcakes to bake on the 24th for a special client, but other than that, a nice hopefully well deserved break until the Wedding Cake for the 5th January.

So until next time, have fun.
Mandy-Jane


Tuesday 27 November 2012

Good Morning Everyone.

Thank you all for your patience in waiting for me to post pictures.  I thought, before I get too busy today (Still have a couple of Figurines to make for Saturday).  I best post the pictures of cakes that I have done in the past few days.

So first up:  I got to do a Princess Crown cake again (Yippee!)  I totally love all the glitz, shine and shimmer I get to put on these cakes.
This one was also for a special Princess who turned One.


And than for the same day, I got to make a very special Barney Picture Cake (4 baby Barney dinosaurs on each corner as well!).  With the cake came a bunch on Mini Cupcakes in Edible cups.  Which I think is soooo perfect for little fingers.  I am surprised people don't order them more often.  I think they are just gorgeous (Plus you don't have to worry about paper wrappers lying around - or been chewed on by little ones).


And yesterday I got to make a Spiderman/Batman Cake.  Yep, half & half.  Seeing Jude's face when he saw his cake last night was just too precious.  I don't think he could have smiled any wider, or any harder.  So this is why I do what I do.
The original design is from:  Celebrate-with-cake.com.  I made a couple of changes, but generally kept it the same.  Thank you to the original designer.  A lovely cake (And a lot harder than I thought).


Phew!  Still have a few more (okay a lot more) for this week.  And than I am taking a mini Xmas break to be with my family.  In-between the break I have a Wedding Cake to prepare for in January, as well as another girly cake and cupcakes.

So until later in the week.
Have fun
Mandy-Jane


Thursday 22 November 2012

Good Evening All,

So I am typing away covered in Cocoa!  Being baking all day, but just had to stop for a second and post some pictures of a couple of cakes and cupcakes I did for Tuesday for a little boy who turned 1.

I was very happy with the little figurines, thought they all came out well.
So please see below a couple of pictures and a little detail on each one.

First up:  The cupcakes.  They the easy part as these were just picture cupcakes of Happy Feet Penguins


Than I did a small 20cm square cake with a picture of the Birthday Boy surrounded by little penguins I had made a few days earlier.  (Threw in a little Snowman, Snow balls, and Snow flakes)  Came out looking very cute.


And lastly a small 18cm Round cake with 2 little Penguins Ice Skating, and of course the Snowman.  I also added a little "lake".  Pretending the ice had melted (Which is why the penguins weren't skating) Lol.
The design of the Penguins I got of a book called:  100 Fondant Models for Cake Decorators.  By Helen Penman.


I really enjoyed doing the Happy Feet and Penguin cake.  Just perfect for a little 1 yrs old.

Will have more to show on the weekend, and than next week is very busy with 5 cakes and 1 cupcakes to do.
As usual there are more photos of the above in my gallery.  I do hope you all like the Penguins, and that some of you have tried the Tutorial I posted a week back.

Until next time.  Have fun.
Mandy-Jane


Monday 19 November 2012

Good Morning All,

It seems like absolute ages since I last posted a cake to show!
So today I finally have something.  As you all know, the past couple of weeks I have been doing prep work for a bunch of cakes I will be doing for the coming weeks.  And this is the first of many to be coming your way.  This week I will have 6 (Yes 6!) Cakes and Cupcakes to show during the course of the week, so hold on to your hats!.

Okay, so today I got started off with a Bachelorette cake on Saturday (don't worry, it's not X-Rated! Lol).
I had fun and frustration doing this cake.  As simple as it looks, I had a little problem with sticking the darned Fondant onto the side of the cake! (My fault, I don't know where my head was when I planned the cake).  You see, the cake is a Red Velvet Cake with a Cream Cheese Frosting (Yip, I colored it Pink!).  Now any baker will know that Cream Cheese and Fondant are not the best of friends (Which is normally why I tell my clients when I do a Red Velvet design, that it is best to go with Buttercream).
You see, Cream Cheese makes Fondant, Sticky and soft and soggy!, so putting the fondant on the side of the cake just makes the fondant slide down.
I did manage to save the cake, and came up with a solution of painting the Martini Glasses (Not shown in this picture).  But I did give the client new cut out pieces of the Martini Glasses so that she could put them on the side of the cake a few minutes before if she wanted to.
So enough waffling!, here is the picture.  I hope you all enjoy.  And I do hope the client enjoyed her Red Velvet Cake with Cream Cheese frosting.
The original design is not mine, but I don't know who's it is.  So when and if I do find out, I will credit the designer than.


There are more pictures in the gallery.
So until next time.  Have fun
Mandy-Jane

Friday 9 November 2012

Good Morning Everyone!

So this week, I put aside to do a bunch of pre-preparation for a ton of cakes I have to do for the upcoming weeks!  So no cake pictures today.  Sorry.
Instead, though, I thought you all might like a little Tutorial that I made up.  It is a description with photographs of how to make a little PENGUIN!

Now anyone can do this, even if you are a first timer.  So don't be afraid to give it a try.
Photos to follow, with a description of each photo under.
Enjoy!

So this is the cutsey little Penguin you will be making.  This one is very small (Doing them for a cake I will do in a couple of weeks).  But you can make them any size you want.


So This is what you need:  Some Black Sugar Paste, A smaller amount of White Sugar Paste, and an Even Smalller amount of Orange Sugar Paste.
You also need, a small pair of sharp scissors, Some gum glue (Water also works just fine). A sharp precision knife, some Black Gel (Or a Black Edible Pen). a couple of Paint Brushes, and some Mazeina (In a cloth for dusting).


So the first thing you do is:  Roll you Black Sugar Paste into a Ball, than thin out the top into a "Skittle" shape (For those that don't know what a Skittle is, it's the things you knock over in Ten Pin Bowling).  You can also call it a "blunt" tear drop.


Then, with your small sharp scissors, at an angle from the bottom, cut/slice two little wings (One on either side).  Then with your Thumb and any other finger that you deem comfortable with, push out the wings, and rub to flatten, pulling a little to make them longer.  (don't be afraid, you shouldn't break it too easily).


Take a small ball of white Gum Paste, Roll it into a Oval shape, than with your finger, gently rub it flat.  Measure it onto the front of your Penguin until you are satisfied it covers the whole tummy area.  Stick on with Gum Glue or a teensy weensy amount of water.


Take two small pieces of White Gum Paste, Roll into an oval shape and very gently flatten them.  Glue them onto your Penguin for eyes.


Now for the Orange Gum Paste.  Take one small piece and roll it into a ball.  Cut it in half, and than roll it into a sharp teardrop shape.  Flatten by rubbing gently with your finger, until you have a flat tear drop shape (for the feet). 


With your sharp precision knife (Using the back of it - it is more blunt).  Gently push into the feet to create little toes.  Push your two feet together, and measure with your Penguin, until you are comfortable with the size of the feet.  Glue the feet onto the Penguin.


Then take an even smaller piece of Orange Gum Paste.  Roll into a teardrop shape, measure to your Penguin, and cut the "back end" off as shown in the above pictures.  Glue the Beak to the Penguin.


AND FINALLY!  Using either your black edible pen, or the black gel paint, and a really thin paint brush.  Paint on two little eyes (Try make them look wonky to give it a funny look).  You can then adjust you Penguin wings to the way you want.

Phew!  Hope you all enjoy making your Penguins.  These little ones you will get to see in a couple of weeks on a cake.

So until next time.  Have Fun
Mandy-Jane
Sunday 4 November 2012

Good Evening All,

So this weekend, I got to do a real girly cake for a little 1yrs old.  With lots of Pink, shimmer, Shine and glitter.  (Note to self:  Don't wear black pants when shimmering and glittering!).

I absolutely loved doing this cake.  And finally I finished a cake and was totally happy with it.  Normally I always look at my cakes, and find all sorts of things wrong with them (Even though the clients don't see it).  This one, I tried to find something wrong, but was just totally happy, and satisfied.

I do hope you enjoy the pretty pink colors.
Credit for the original design belongs to: "Harts Delights"

So until next time.  Have Fun
Mandy-Jane

Wednesday 31 October 2012

Good Evening All,

Well a few of you may experience a bit of De je vu with the attached pictures.  That's because I have done both the Cake and the Cupcakes previously.  Both such popular designs.

The cake:  Is a Castle Cake.  The original designers of the cake are www.simplysweetsaz.blogspot.com, who themselves have said what a popular design it is.
I was lucky enough to be given the opportunity to do this style for a second time.  This time for the prettiest little 6 year old.

The cupcakes are a favorite color for many of my clients.  And they are certainly one of my favorites as well.

So, please enjoy the pictures.


So until next time.  Have fun
Mandy-Jane

Sunday 28 October 2012

Good Evening All,

Well, when I wasn't looking, I hit over 2000 views!  Thank you all for coming to visit my page.

So, as promised, I have some photos to show this week.  What a week it was!  I had a Wedding Cake & Cupcakes to make, as well as a Birthday Cake, and now I have started on another Birthday Cake for Tomorrow evening!  I JUST CAN'T SAY NO!

I am very excited to show you the Wedding Cake & Cupcakes, and I loved how they turned out looking so good.  (Well at least I think so).  It was a special Wedding Cake, and every part of it had a special and personal meaning to the Bride & Groom,  right down to the gorgeous little Panda Bear Topper that I made all out of Fondant.
The cake was a Choc Mint flavor, covered in White Fondant, with special "swirlys" around the cake.
The cupcakes were Chocolate & Vanilla, with 360 Flowers in total made!

I don't have pictures of the cake at the venue (It looked sooooo much nicer their).
But I do hope you all enjoy the pictures I am about to show you.

BUT! Before I show you the Wedding Cake.  I had a Dora Birthday Cake to make first.  The original design of the Dora Cake is not mine, and I unfortunately cannot give the designer credit, as there was no watermark on the picture.  I did make a couple of my own personal changes.  The cake was made for the daughter of an existing client.  ( I made a Handy Manny cake for there Son a few weeks ago), so I definitely could not say no.  Between the Dora Cake, and the Wedding Cake, I finally got to bed at 04:15 on Saturday morning.  And up again at 06:30!  Phew!

So please enjoy all the pics of the Birthday Cake & Wedding Cake.
And yes, there are more pictures in the Gallery Section.


Well, until next time, Have fun
Mandy-Jane

Sunday 21 October 2012

Good Evening All,

Well, sadly, I have no pics for you this week.  But I have been busy, busy, busy with preparation work for 3 CAKES! next week.

So far, I have done 1 x Cute Wedding Cake Topper, 500 x Flowers!, 120 x Bows, 120 X Ribbons, A Happy Birthday plaque, 8 x Character Plaques, Templates for a Birthday Cake & a Wedding Cake, A Large Number to go on top of one of the Birthday cakes, a Hand Painted Teeny Tiny Flag, and a bunch of other stuff I am forgetting. Phew! So yes, I have certainly been a busy bee this past week.

Tomorrow, I go shopping.  Yippee!!, I get to go out the house!.  Need to stock up on 60 Eggs, 10kg flour, 20kg Icing Sugar, 2kg Cocoa, 1kg Butter, Packaging, Gels, and a bunch of other stuff.

Every time I do a cake, I get excited!  I picture it in my mind (Or sometimes I look at the picture on my PC) and I can't wait to see what it will look like once it is all done and completed.

Now I would hate to leave you all without something pretty to look at, so I am attaching a picture of cake from "Yummy Cupcakes & Cakes" they are based in Australia.  Their website is:  www.yummycupcakes.com.au, and they are on facebook and Twitter.
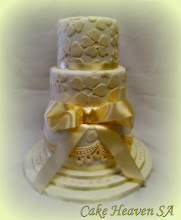
This picture of a wedding cake is just pure elegance.  I absolutely love there work, so please go see the rest of it on there pages.

I hope they don't mind me sharing there work, but as you can see.  Just BEAUTIFUL!

So until next week, have fun
Mandy-Jane

Monday 15 October 2012

Good Evening All,

Well, as promised, I have another cute cake to show.  This one was for a little boy by the name of Joel, who turned one yesterday.
I really enjoyed making this cake, and it came out looking nice and bright and happy.
The original design was not mine, but I don't know who's it was.  I did change a couple of things and added a few of my own ideas.
I marbled the blue to make it look more like a sky, and stuck on a couple of clouds.  I loved wrapping the trees onto the cake, it made the cake looks so cute.
The client was extremely happy with the cake, as you will see under my comments section.  And there is nothing more satisfying then a satisfied customer.
Thank you to Natasha & JP for given me the opportunity to make this cake.
Okay, so her is a picture.  And more in my gallery.
Next weekend is going to be a hectic one, with a Wedding Cake, and a cute cake for a cute girl.
So until then, have fun
Mandy-Jane

Sunday 14 October 2012

Good Evening Everyone,

Well this weekend was a very busy and exhausting weekend.  Worked through Thursday and Friday (Till 02:00 Saturday Morning) to get 2 cakes finished for Saturday.
First up was my daughters birthday party on Saturday, and turning 5.  Of course the Picture Cake is no longer acceptable at that age anymore.  Mommy here had to make a full on 3D Castle Cake! Princesses and all!  I cheated the a little bit, and sourced the Disney Princesses from overseas. (There was no way I was going to try mold them!).  Kirsten did help me with the design of the castle of course.  The cake ended up looking just the way I wanted it to look.   Yah!  She was the envy of all her friends.  (No I am not bragging.....  Okay, maybe just a little).  I really did go all out for her. (Well she is my daughter).
So what we got was:  Chocolate Sponge bottom layer fill with Cookies and REAL cream filling, and a Dark Chocolate Ganache.  The Top 2 circle layers were Vanilla Sponge filled with Vanilla Mousse, and a White Chocolate Ganache.  And of course all the other bits and pieces that go into making a Castle Cake fit for a Princess.
So here is the Picture.

Of course, there are more close up pictures in my gallery.
Tomorrow I will show you all the second cake I did, for the cutest little boy who turned 1 today!  His name is Joel.

So until then, have fun.
Mandy-Jane

Thursday 4 October 2012

Good Evening All,

Well, I have been promising on my Facebook for a few days now to post some pictures of a new Chocolate Cake that I decided to make.
So yesterday, I finally baked the cake.  It tastes amazing!.  I received a ton of compliments today from those that got to taste, and will definitely be baking this one again.

This cake is PURE DECADENCE! PURE ELEGANCE! PURE LUXURY!

I did not skimp on any of the ingredients, and opted to use proper Double Thick Cream instead of the box stuff that so many other bakers use.  So if anyone is going to want this cake, they must be prepared to pay a little more, because using inferior products would totally ruin the cake.

So, I made a Chocolate Cake, with a Cookies & Cream Filling (Yummy!) and Dark Chocolate Ganache (Another Yummy!).
This is what the cake looks like.  Only wish you could all taste it too.


Well, until next time.  Have fun!
Mandy-Jane

Saturday 29 September 2012

Good Evening All, (Again!)
Yep, me again!  2 posts in one night! Phew, I think that is a new record for me.

Well this time, I have a very special cake to show you.  There is a bit of a story behind this cake.  Originally the Cake was ordered by a lady in Australia for someone here in South Africa.  Unfortunately, due to the very expensive international banking charges, she had no choice but to cancel the order.
However, I loved the cake so much, I decided to make it anyway.  It was then donated to the Durbanville Kinderhuis (Childrens Home).
My heart bleeds, and sings at the same time when I see those beautiful children so excited over something that us lucky folk take for granted.
So I do hope the girls at the home loved there cake. (I wonder who got the Icecream Cones?).
The turrets were covered in Fondant (Much easier than trying to smooth them out with buttercream).  The 2 Tier cake was covered with buttercream.  The filling was Banana flavored Buttercream for the bottom layer, and Strawberry flavored buttercream for the top layer.  There are approximately 130 flowers around the cake. 
And as usual, there are more photos in my gallery.
Until next time.  Have fun
Mandy-Jane

ADDENDUM:  I didn't know who made the original design of this cake until now.  So I would like to acknowledge and thank www.simplysweetsaz.blogspot.com  for such a beautiful design.  So sorry I was not able to acknowledge your very popular design until now. (I finally found it when I googled the picture). 
Simply Sweets is based in Phoenix Arizona, and there blog is gorgeous! and there cakes look amazing!

Good Evening All,

Well tonight I have a surprise Birthday Cake to show you, that I made for one of the Owners of BMW in Paarl.  I do hope he liked the cake.  It was ordered by his staff.

I made the cake with Red Velvet, but instead of Cream Cheese Filling, I used Buttercream Icing (Which tastes just as good on Red Velvet).  Since the client was going to collect the cake on Thursday, I had to bake the cake on Wednesday.  I started 08:00 sharp on Wednesday morning, and finally got to finish the cake at 03:00 Thursday morning.  Yep!  I pulled and all day and all nighter to get this cake ready for her!

The BMW on the flag was hand painted.  The Golf Ball on top of the cake was also Red Velvet, covered in a thin layer of Fondant, and Titleist hand painted.  The Scroll was also hand painted. The whole cake was covered in Buttercream Icing, hence the slightly wobbly  edges.  Boy! Buttercream is a bugger to get smooth.  So prefer to work with fondant.
So here is a picture of the cake:


There are a few more photos in my gallery.  Hope you all like the cake.
PS:  I cannot credit myself for the design, as the design was found on Google.  However, I don't know who designed the original cake, so I apologize for not being able to name the creator.
Until next time, have fun.
Mandy-Jane


Monday 24 September 2012

Good Morning All,

Sorry, been a while since I posted photos.  We've had a long weekend, and with my husband studying for his exams, I have been looking after our daughter.

This weekend I had an easy weekend with only 2 Picture cakes, Cupcakes and Cookie Pops to make.

Okay, so I don't have pictures of the Cookie Pop Bees (They were such a nightmare to make! that I nearly ended up crawling into a cupboard and not coming out!) They eventually turned out looking great, but I just don't want to see them again! for a while!

So here are some Pictures with details beneath each one.

JUSTIN BIEBER PICTURE CAKE!
This was for a young girl turning 8 (Note the 8 on the picture.  Ha, ha).  She LOVED her pretty pink and purple colors.


 BUSY BEE PICTURE CAKE!
It was my daughters turn for Bakerman at School on Friday, and since she is in the Busy Bees class, I thought it would be appropriate to make her a Busy Bee Cake.  NOTE THE CUTE LITTLE BEES ON THE CORNERS.  They were so much fun to make, I could have done tons of them!


 CUPPACCINO  CAKE!
So I had a little spare time on Thursday, and decided to try out a new recipe.  Now I am generally NOT  a coffee cake fan.  But boy! is this cake yummy!  Especially the next day!  Not a cheap recipe, but great for a tea party or similar.

 BRIGHT AND BEAUTIFUL CUPCAKES!
Don't you just love these colors!  This was also for a young girls birthday party.  And once I had colored the buttercream, the cupcakes looked absolutely gorgeous!  I especially loved the Yellow and Green ones.

Well this is all till next week.  Have 2 big cakes to show next week.  So keep watching out for them.
More pictures of the above are posted on my gallery.

So until next time, Have fun
Mandy-Jane